
A Renter-Friendly Guide to Installing Privacy Screens on a Balcony
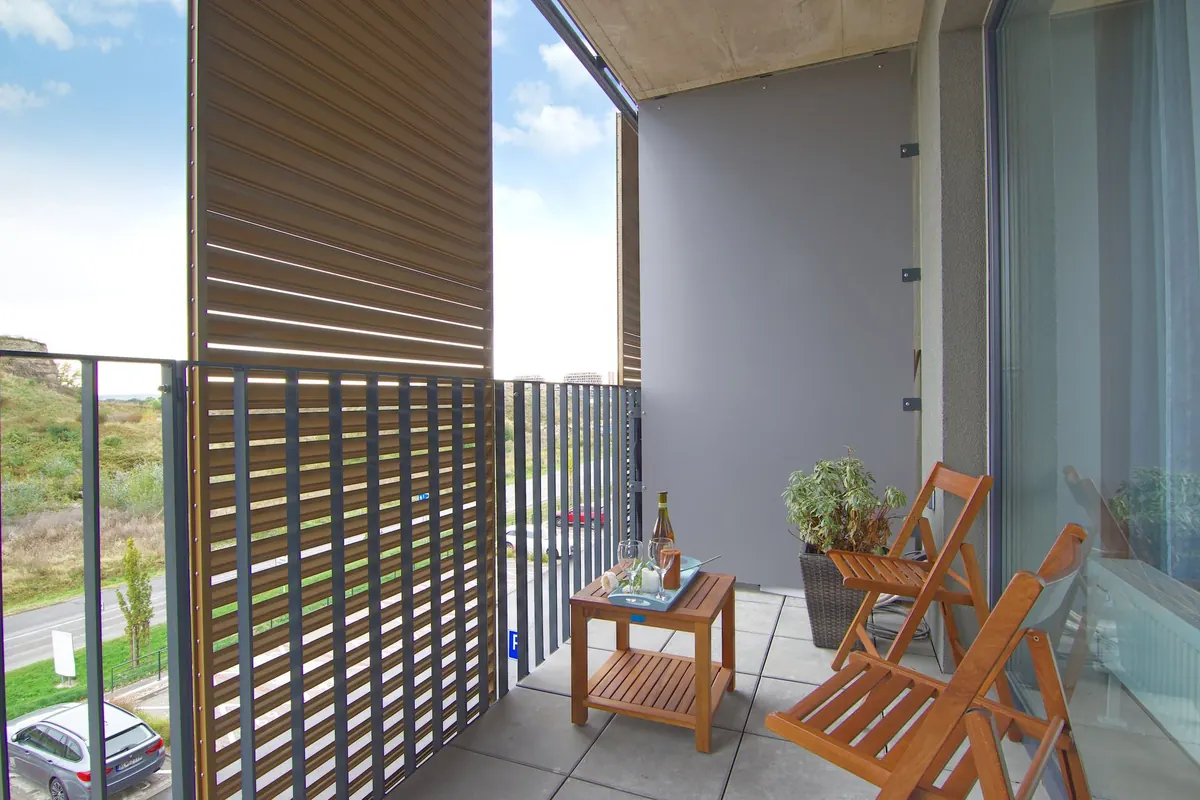
Renters get the balcony, not the balcony itself. That one fact rules out most of the privacy advice online, which assumes you can drill into concrete, bolt brackets to a wall, or fix a trellis to the parapet. The no-drill options have improved, though, and several of them look deliberate rather than improvised. What follows is a practical order of work: measure first, choose fixings, pick a screen that handles wind, install it in a sequence that holds, and take it down at the end without a deduction from your deposit.
Measure, Check the Rules, Then Shop
Ten minutes of reconnaissance saves a wasted purchase. Stand on the balcony with a tape measure, a notepad, and a critical eye, and note the following:
- Railing type and thickness. A flat-topped metal rail, a round tube, glass panels, and a solid concrete parapet all need different fixings. Measure the rail's width, not just the balcony's length.
- Bay widths and post spacing. Most screens are cut or bought per bay. Measure the gap between posts as well as the full run.
- Wind and sun. A corner balcony on a high floor behaves nothing like a sheltered inner courtyard. Note which direction the prevailing wind hits and how many hours of direct sun the railing gets.
- Your exit route. Nothing should block the door, the path along the balcony, or any part of a fire escape. If the balcony is your escape route, keep it clear.
- Lease and building rules. Many leases restrict anything attached to the railing or visible from outside; strata and homeowners' associations often limit height, colour, and material. Ask your landlord or building manager before you buy, and get the answer in writing if you can.
No-Drill Fixings That Actually Hold
The fixing matters as much as the screen. These are the ones worth keeping in a drawer:
- UV-resistant zip ties. Cheap, strong, and almost invisible. Loop them around the rail rather than through a gap if you can, use two per attachment point so a single failure doesn't drop the panel, and trim the tails flush so they don't scratch arms or paint.
- Bungee ball ties. Reusable and slightly forgiving, which helps in gusty spots. Ideal for fabric screens with grommets.
- Tension rods. For recessed balconies with two parallel walls. Look for rubber or silicone ends that grip without marking paint.
- Hook-and-loop straps and webbing. Gentle on painted railings and better than zip ties on very thick rails that they can't grip.
- Removable adhesive hooks and strips. Only on smooth, clean, painted surfaces, and only following the manufacturer's removal instructions. They fail on textured, dusty, or damp surfaces, and heat softens the adhesive.
- Weighted bases and planters. No attachment at all. The heavier the base, the less the panel moves.
Skip suction cups for anything permanent. They hold well in a showroom and let go on a warm, windy afternoon.
Screen Options Worth Considering
Fabric and mesh panels
A woven shade cloth with grommets along the edges is the easiest first purchase. Choose a fabric that lets some air through rather than a solid, coated tarp, which will behave like a sail. Cut it slightly wider than the bay so it doesn't pull taut at the corners.
Roll-up bamboo and reed screens
These look warm against brick and concrete, and they can be cut to size with a fine-toothed saw. Attach with zip ties through the binding wire, top and bottom. They will weather, so plan to roll them up before a storm and to replace them after a couple of seasons.
Freestanding panels and planter screens
A panel slotted into a weighted base, or a planter with a built-in trellis, needs no fixing at all. It's the safest option for buildings with strict rules, and the heaviest to move. Remember that wet soil weighs a great deal; check with your building manager if you're planning several large planters, since balconies do have load limits.
Tension-rod and clamp-on shades
Retractable roller shades and spring-loaded fabric panels are the tidiest-looking solution, though usually the priciest. Some clamp onto railings rather than being screwed in, which makes them worth asking about. They suit sheltered balconies far better than exposed corners.
Living screens
Climbing jasmine, ivy, or a lightweight annual on a small trellis takes longer to fill in but reads as part of the building rather than an addition to it. Pair it with a drip tray so runoff doesn't annoy the neighbour below.
Wind, Weight, and Safety
Wind is what turns an inexpensive screen into a repair bill. A solid, non-porous panel laced tightly to a railing can pull at the rail, tear at the grommets, and rattle loud enough to bother everyone inside. Three habits prevent most of it.
First, let air through. Porous materials, a gap at the bottom, and a screen that stops short of the ceiling all reduce the load. Second, secure the bottom edge, not just the top; an unsecured lower edge flaps until it shreds. Third, keep ventilation and exhaust clear, and never enclose a space where a heater, grill, or air-conditioning unit is running.
If your building has rules about fire escapes, they exist so that a ladder or door stays usable in an emergency. Nothing you add should obstruct egress. If you're unsure whether a planter setup or a heavy screen is appropriate for your balcony structure, ask your building manager before installing it.
A Simple Installation Sequence
- Lay everything out and dry-fit the screen before attaching anything. Check the height against your eye line when seated, not just when standing.
- Wipe the railing with a damp cloth so fixings grip clean metal rather than grit.
- Attach the top edge first, starting with the two or three points where sagging is most likely, then work outward.
- Pull tension gently. Taut is right; drum-tight stresses the fabric and the rail.
- Fix the lower edge with the same fixings, or weigh it down if you'd rather leave it loose.
- Step back and look from inside your apartment and from the street. The screen is usually more visible to others than you expect.
- Leave it a day, then retighten. Fabric stretches and settles.
- Test it on a breezy day. Watch for flapping, rattling, and anything pulling at the rail, then adjust.
Taking It Down Without Losing Your Deposit
Photograph the railing and walls before you attach anything. Dated photos are cheap insurance if a question comes up later.
When you leave, cut zip ties flush rather than yanking them, and peel adhesive strips slowly in the direction the instructions specify, usually downward and stretched rather than outward. Remove residue with warm soapy water, and test any stronger cleaner on a hidden spot first. Roll fabric screens rather than folding them, store bamboo flat and dry, and touch up any small scuffs while you still have the paint colour on hand.
Start With One Panel
Buy a single screen for the most exposed bay and live with it for a week. You'll learn how the wind behaves at your height, how much shade you actually want, and whether the colour looks right against the building. Then expand. It's a cheaper way to get the balcony you want, and a much easier one to undo if you move. If you're uncertain about your lease terms or what your building permits, ask your landlord, building manager, or a tenancy advice service before you spend anything.
Photo: Marian B. / Pexels